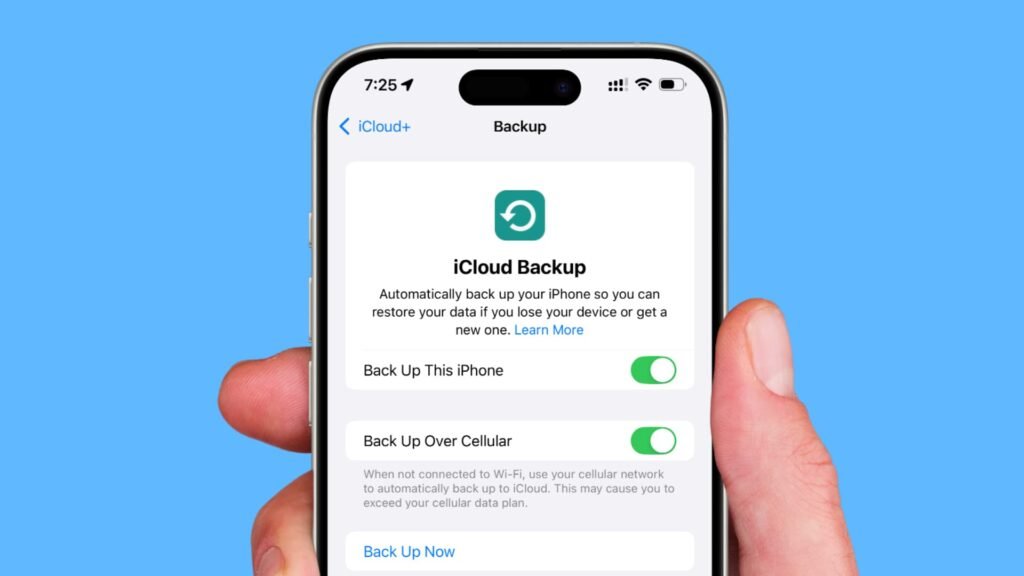
1. Understand the Importance of Backups
○ Data Protection: Backing up your iPhone ensures that all your important data—contacts, photos, messages, and app data—is safe and recoverable in case of loss, damage, or theft.
○ Easy Restoration: Backups allow you to easily restore your data if you upgrade to a new iPhone or if your device needs to be reset.
2. Choose Your Backup Method
○ iCloud Backup: Automatic, wireless, and accessible from anywhere. Requires an iCloud account and sufficient storage space.
○ iTunes/Finder Backup: Local backup on your computer, which can be encrypted for added security. Ideal if you prefer not to use cloud services.
3. Set Up iCloud Backup
○ Enable iCloud Backup: Go to Settings > [Your Name] > iCloud > iCloud Backup and toggle on iCloud Backup. Tap Back Up Now to start a manual backup.
○ Automatic Backups: With iCloud Backup enabled, your iPhone will automatically back up daily when connected to Wi-Fi, plugged into a power source, and locked.
4. Manage iCloud Storage
○ Check Storage: Go to Settings > [Your Name] > iCloud > Manage Storage to view your current iCloud storage usage.
○ Upgrade Storage: If needed, upgrade your iCloud storage plan by tapping Change Storage Plan and selecting a plan that fits your needs.
5. Perform an iTunes/Finder Backup
○ Connect Your iPhone: Use a USB cable to connect your iPhone to your computer.
○ Open iTunes or Finder: For macOS Catalina and later, use Finder. For earlier macOS versions or Windows, use iTunes.
○ Back Up: Select your iPhone when it appears in iTunes or Finder, then choose Back Up Now. You can select Encrypt iPhone Backup to secure your backup with a password.
6. Encrypt Your Backup
○ Secure Your Data: To ensure your backup includes sensitive information like passwords and health data, enable encryption. In iTunes or Finder, check Encrypt iPhone Backup and create a password.
7. Verify Backup Status
○ Check Backup Completion: Go to Settings > [Your Name] > iCloud > iCloud Backup to verify the last backup date and time.
○ Review Backup Details: In iTunes or Finder, check the Latest Backup date and time to confirm the backup was successful.
8. Restore from iCloud Backup
○ Erase iPhone: If you need to restore from an iCloud backup, first erase your iPhone by going to Settings > General > Transfer or Reset iPhone > Erase All Content and Settings.
○ Set Up and Restore: Follow the setup instructions, then select Restore from iCloud Backup and sign in to your iCloud account to choose the backup you want to restore.
9. Restore from iTunes/Finder Backup
○ Connect and Restore: Connect your iPhone to the computer with the backup. Open iTunes or Finder, select your iPhone, and click Restore Backup. Choose the backup you want to restore and enter the encryption password if applicable.
10. Manage Backup Settings
○ Select What to Back Up: On iCloud, you can manage what gets backed up by going to Settings > [Your Name] > iCloud > Manage Storage > Backups and selecting your device. Toggle off any apps or data types you do not wish to back up.
11. Back Up to Multiple Locations
○ Diversify Backup: For added security, consider backing up to both iCloud and iTunes/Finder. This ensures you have multiple copies of your data in case one backup fails.
12. Update Backup Regularly
○ Frequent Backups: Ensure that backups are performed regularly, especially before major updates or changes to your device. Manually initiate backups as needed to keep your data up-to-date.
13. Monitor Backup Health
○ Check for Errors: If you encounter issues with backups, check for error messages in iCloud or iTunes/Finder. Ensure your device is connected to Wi-Fi for iCloud backups and that your computer is running the latest version of iTunes or macOS.
14. Secure Your Backup Passwords
○ Keep Passwords Safe: If you use encrypted backups, keep your passwords secure and memorable. Losing the encryption password means you won’t be able to access the encrypted backup.
15. Delete Old Backups
○ Free Up Storage: To manage storage space, delete old backups you no longer need. In iCloud, go to Settings > [Your Name] > iCloud > Manage Storage > Backups, select a backup, and tap Delete Backup.
16. Check Compatibility
○ Ensure Compatibility: Make sure that your backup is compatible with the iOS version on your new or reset iPhone. Backups created on newer iOS versions may not restore to devices running older iOS versions.
17. Backup Apps and Data Separately
○ Use App-Specific Backup: Some apps offer their own backup options (e.g., cloud storage for documents). Utilize these features in addition to iCloud or iTunes/Finder backups to ensure all data is preserved.
18. Use Third-Party Backup Solutions
○ Explore Alternatives: If you need additional backup options, consider third-party solutions that offer enhanced features or extra storage options. Ensure they are reputable and secure.
19. Review Backup Security Practices
○ Check for Security: Regularly review the security practices for your backup methods, especially if you use cloud storage or third-party solutions. Ensure your data is encrypted and protected from unauthorized access.
20. Educate on Backup Procedures
○ Share Knowledge: If others use your iPhone or if you manage multiple devices, educate users on how to perform backups and the importance of keeping data secure.
By following this guide, you’ll ensure that your iPhone data is consistently protected and easily recoverable, safeguarding your personal information against loss or damage.


