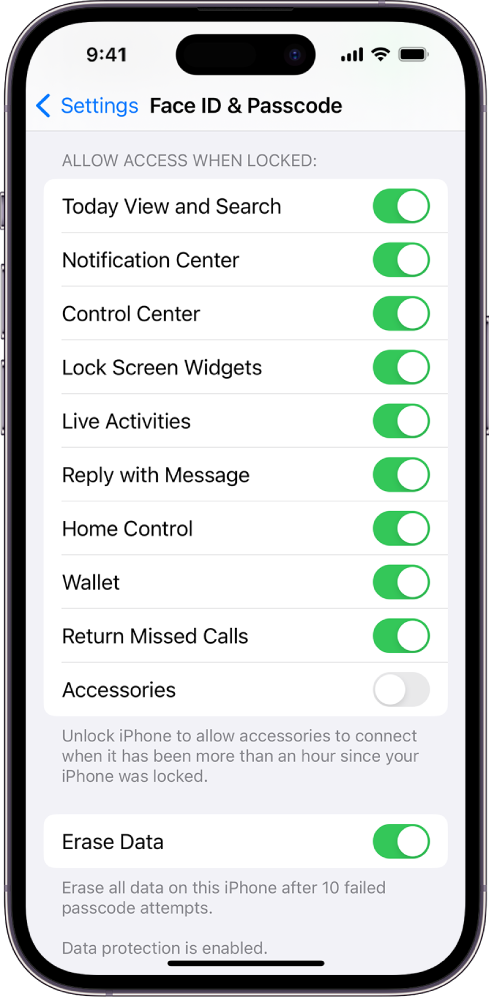
In this guide, we’ll walk you through the steps to enhance the security of your iPhone by disabling access to the Control Center when the device is locked. This simple yet effective measure ensures that your private information remains protected. Follow these steps to restrict Control Center access while still maintaining convenience for yourself.

Step-by-Step Guide:
- Navigate to Face ID & Passcode:
- Open the Settings app on your iPhone.
- Scroll down and tap on “Face ID & Passcode.”
- Access Permissions:
- Once in the Face ID & Passcode settings, scroll down to find “Allow Access When Locked.”
- Disable Control Center Access:
- Under “Allow Access When Locked,” locate the option for “Control Center.”
- Toggle off the switch next to “Control Center” to disable access when the iPhone is locked.
- Verify the Change:
- With this setting disabled, anyone attempting to access the Control Center by sliding down from the top right corner when your iPhone is locked will be denied.
- Maintaining Your Access:
- Despite the lockdown for unauthorized users, you can still access the Control Center seamlessly by unlocking your iPhone with your face using Face ID.
Congratulations! You’ve successfully taken a proactive step in securing your iPhone by restricting access to the Control Center on the lock screen. This added layer of privacy ensures that your device remains safeguarded against unauthorized attempts to access sensitive features.
For additional insights and a visual guide, you can watch this informative video tutorial: Disable Control Center on Locked iPhone.
Note: These steps are applicable to general iPhone use. Keep in mind that settings and features may vary based on updates and specific iPhone models.


